Helpful Links
- Download: SmartMag – Responsive News & Magazine Blogger Template
- Tutorial: How to Install a Blogger Template
- Tutorial: How to Setup Buttons, Alerts, Contact Form and More
1. Header Logo
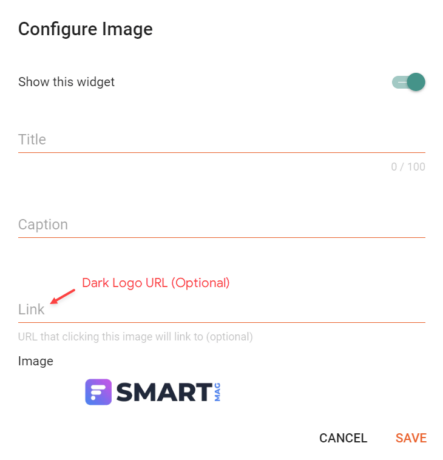
Access your blog Layout > and click on the Edit Icon > in the Header Logo (Image) gadget.
Example:
2. Header Menu
Access your blog Layout > and click on the Edit Icon > in the Header Menu gadget.
2.1. Default Links and Sub Links
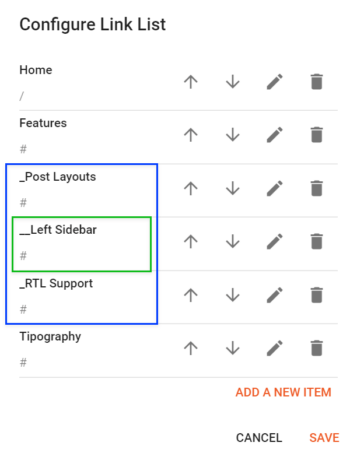
Default Link Example: Features
SubLink Level 1 Example: _Level 1 “Before the Title add 1 underscore”
SubLink Level 2 Example: __Level 2 “Before the Title add 2 underscore”
Example:
2.2. Menu Icons
This template uses Bootstrap Icons as the main icon source, so you can choose from thousands of awesome icons to use on your menu link.
Icon Code: <i code="HTML Code"></i>
How to get HTML Code?
Step 1 – Go to the Bootstrap Icons Gallery.
Step 2 – Search for the desired icon, then click on the icon to access the info page.
Step 3 – Copy the HTML Code available in the Code Point section as illustrated in the image below.
![]()
Step 4 – Edit the link text by adding the Icon Code as in the example below.
![]()
2.3. Mega Menu
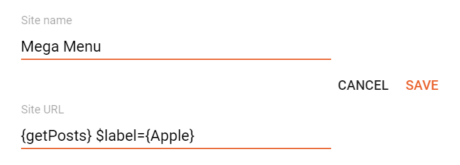
Shortcode: {getPosts} $label={Label Name}
Label Name: Custom Label, recent
The $label={} attribute is optional! The default value is recent.
What is Label?

Example:
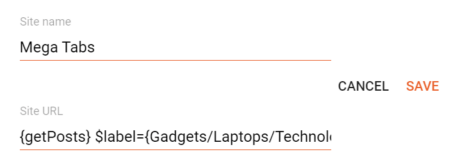
2.4. Mega Tabs
Shortcode: {getPosts} $label={Label Name/Label Name}
Label Settings: Labels must be separated by /. Only 5 Labels are supported.
Example:
3. Header ADS
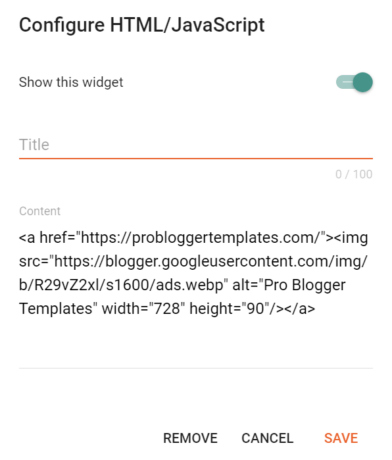
Access your blog Layout > and click on the Add a Gadget > HTML/JavaScript, Image or AdSense > in the Header ADS section.
Example:
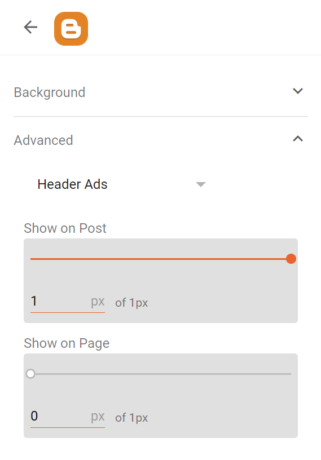
3.1. Display Options
Go to your blog Theme > Customize > Advanced > Header ADS > to change the visibility on Posts and Pages.
4. Featured Posts
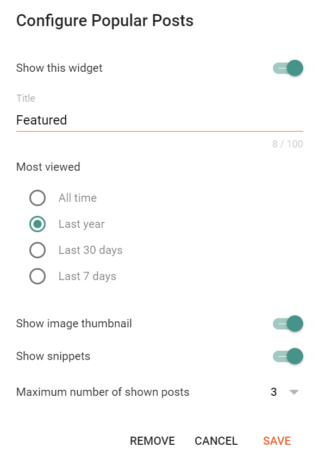
Access your blog Layout > and click on the Add a Gadget > HTML/JavaScript or Popular Posts > in the Featured Posts section.
4.1. HTML/JavaScript
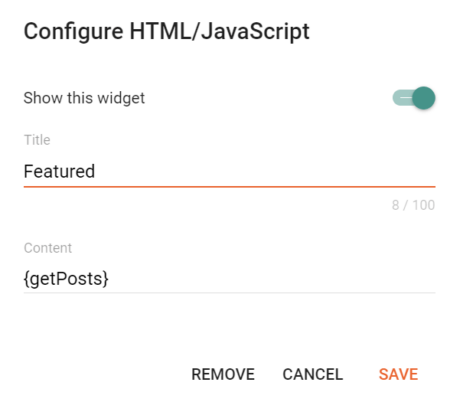
Shortcode: {getPosts} $label={Label Name}
Label Name: Custom Label, recent
The $label={} attribute is optional! The default value is recent.
Example:
4.2. Popular Posts
5. Home ADS
Access your blog Layout > and click on the Add a Gadget > HTML/JavaScript, Image or AdSense > in the Home ADS section.
Example:

6. Trending Posts
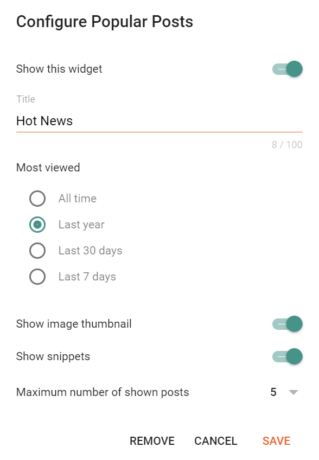
Access your blog Layout > and click on the Add a Gadget > HTML/JavaScript or Popular Posts > in the Trending Posts section.
6.1. HTML/JavaScript
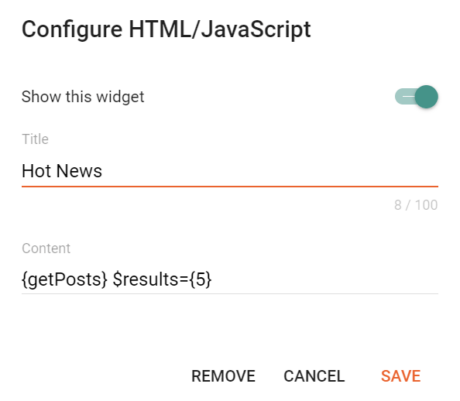
Shortcode: {getPosts} $results={Number of Results} $label={Label Name}
Number of Results: The attribute $results={} is optional! Default is 5.
Label Name: Custom Label, recent
The $label={} attribute is optional! The default value is recent.
Example:
6.2. Popular Posts
7. Content Blocks
Access your blog Layout > and click on the Add a Gadget > HTML/JavaScript > in the Content Blocks sections.
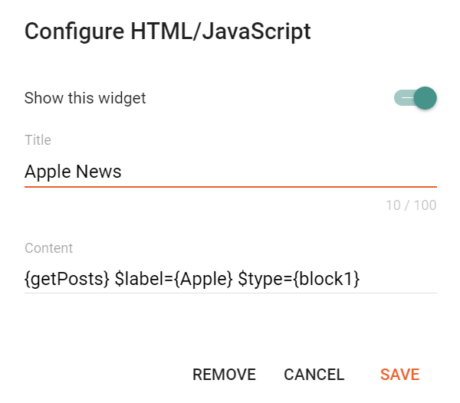
Shortcode: {getPosts} $results={Number of Results} $label={Label Name} $type={Block Type}
Number of Results: This attribute is optional! Add it to define a custom value.
Label Name: Custom Label, recent
Block Type: block1, block2, list, grid1, grid2, col, video
The $label={} attribute is optional! The default value is recent.
Example:
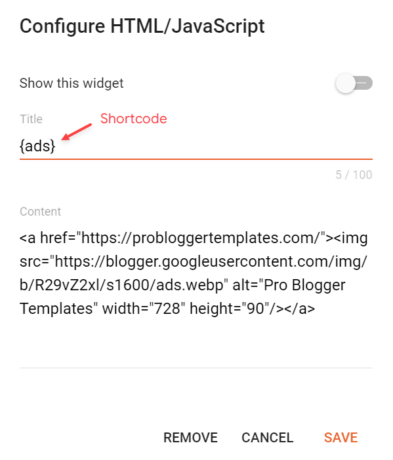
8. Ads Between Content Blocks
Access your blog Layout > and click on the Add a Gadget > HTML/JavaScript, Image or AdSense > in the Content Blocks sections.
Shortcode: {ads}
Example:
9. Main Posts
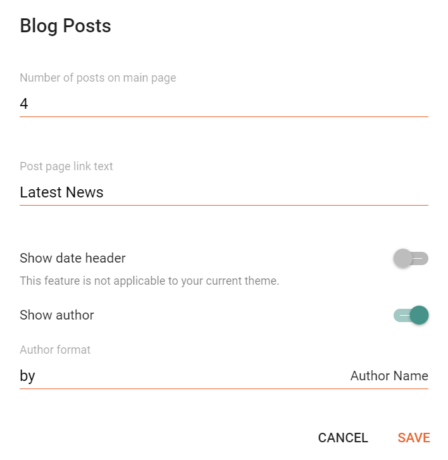
Access your blog Layout > and click on the Edit Icon > in the Main Posts/Blog Posts gadget.
Homepage Headline: Display a custom title by changing the text in the Post page link text field. To hide the title add {hide}.
Example:
9.1. Show Author Profile (Author Box)
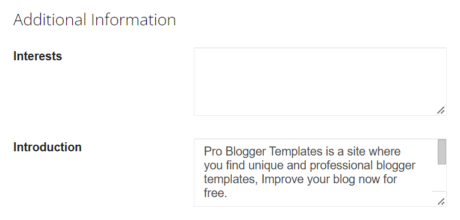
The Author Box receives the blogger profile informations automatically, As long as your profile is marked as public. Icons are displayed if there are html links in the introduction field.
Supported Icons: google, blogger, apple, amazon, microsoft, facebook, facebook-f, twitter, twitter-x, rss, youtube, skype, stumbleupon, tumblr, vk, stack-overflow, github, linkedin, dribbble, soundcloud, behance, digg, instagram, pinterest, pinterest-p, twitch, steam, delicious, codepen, flipboard, reddit, whatsapp, telegram, messenger, snapchat, discord, quora, tiktok, email, share, external-link
Blogger Settings: Go to https://www.blogger.com/edit-profile.g
Find for Additional Information > Introduction > and add your description with HTML links.
HTML Link: <a href="Your Link Here">Icon Name</a>
HTML Link Example: <a href="https://facebook.com/probloggertemplates">facebook</a>
Example:
9.2. Comments Settings
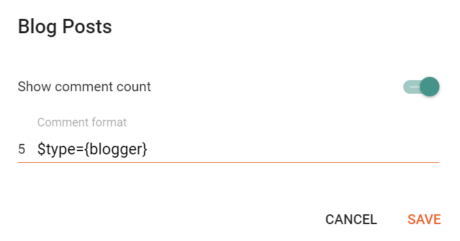
The comment settings are intuitive like never seen before. The shortcodes should be added in > Layout > Blog Posts > Comment Format.
Blogger Shortcode: $type={blogger}
Disqus Shortcode: $type={disqus}
Custom Disqus Shortcode: $type={disqus} $shortname={Your Shortname}
Facebook Shortcode: $type={facebook}
Facebook Custom Language: $type={facebook} $lang={Language Code}
Facebook Language Codes: en_US, es_ES, ar_AR, id_ID, th_TH, vi_VN, pt_BR, fr_FR, ru_RU, de_DE, it_IT
Extra Languages: To use other languages you should check if it is supported by facebook. (Facebook Languages).
Example:
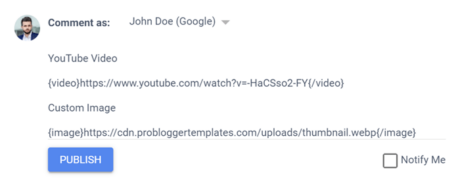
9.3. Embed Media in Blogger Comments
The comment settings are intuitive like never seen before. The shortcodes should be added in > Layout > Blog Posts > Comment Format.
Video Shortcode: {video}YouTube Video URL{/video}
Image Shortcode: {image}Custom Image URL{/image}
Example:
10. Table of Contents
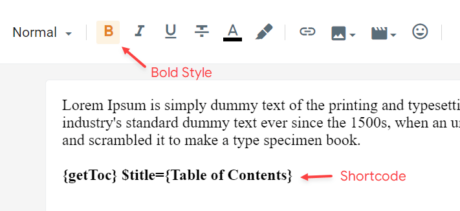
This function is available for posts and pages and can be added easily via shortcode.
Shortcode: {getToc} $title={Table of Contents} $count={Boolean}
Count Options: This attribute is optional! Available values are true or false.
Example:
11. Post Content ADS
Access your blog Layout > and click on the Add a Gadget > HTML/JavaScript, Image or AdSense > in the Before Content, After Content or In-Article sections.
Example:

11.1. Display Options
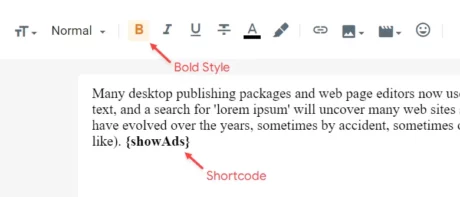
By default, ads in sections Before Content and After Content are displayed only in “Posts”. You can display them on specific “Pages” with the help of shortcodes.
Shortcode: {showAds}
Example:
11.2. In-Article Ads (Between Paragraphs)
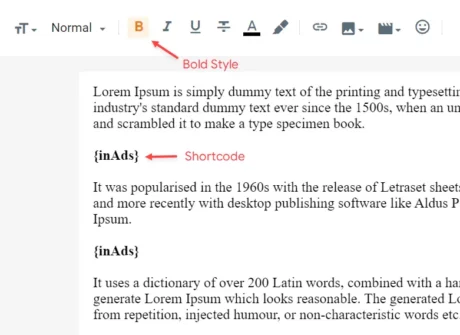
The ad in the In-Article section does not have a defined display location. You can display it multiple times in “Posts” and “Pages” with the help of shortcodes.
Shortcode: {inAds}
Example:
12. Post Cards
This function is available for posts and pages and allows you to add recommended posts, downloads, products and even custom calls to action.
Shortcode: {getCard} $type={Card Type} $title={Card Title} $info={Card Info} $button={Button Text} $icon={Icon Code}
Card Type: post, download, product, custom
Card Title: Attribute compatible with all card types, being optional for the post type.
Example:
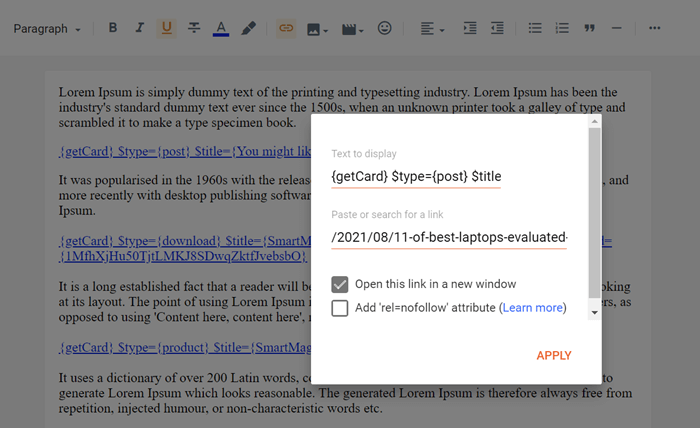
The cards are highly flexible, being able to support specific and unique attributes or even optional attributes.
12.1. Post Type
Shortcode: {getCard} $type={post} $title={Card Title}
Card Link: For this card to work properly, a link to a post must be provided.
Card Demo:

12.2. Download Card
Shortcode: {getCard} $type={download} $title={Card Title} $info={Card Info} $button={Button Text}
Card Link: Add any link whether internal or external.
Card Demo:

12.3. Product Card
Shortcode: {getCard} $type={product} $title={Card Title} $info={Card Info} $button={Button Text}
Card Link: Add any link whether internal or external.
Card Demo:

12.4. Custom Card
Shortcode: {getCard} $type={custom} $title={Card Title} $info={Card Info} $button={Button Text} $icon={Icon Code}
Card Link: Add any link whether internal or external.
Icon Code: This template uses Bootstrap Icons as the main icon source, so you can choose from thousands of awesome icons to use on your card.
Step 1 – Go to the Bootstrap Icons Gallery.
Step 2 – Search for the desired icon, then click on the icon to access the info page.
Step 3 – Copy the HTML Code available in the Code Point section as illustrated in the image below.
![]()
Card Demo:

13. Post Split (Content Pagination)
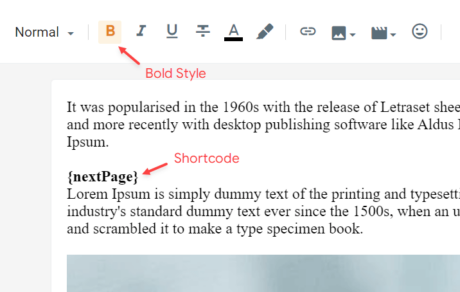
Divide the post content into multiple parts making it interactive and improving the user experience. Combine with ad duplicator to create viral posts and increase ad earnings.
Shortcode: {nextPage}
Example:
How to Translate the Pagination?
Being a custom resource, pagination does not have automatic translation. You can translate it by editing the JSON Variables file following the instructions in topic 28.2 of this documentation.
14. SafeLink Generator
This online tool allows the creation of safelinks with modern and exclusive cryptography fully compatible with the Download Page and Safe Page functionalities.
Step 1 – Go to the SafeLink Generator.
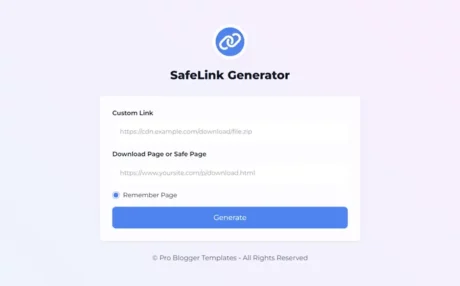
Step 2 – Add the Custom Link you want to encrypt in the first field.
Step 3 – Add your Download Page or Safe Page link in the second field.
Step 4 – Click the Generate button.
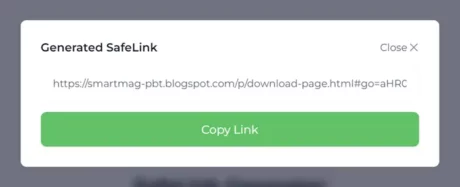
Step 5 – Done! Click the Copy Link button to get the Generated Safelink.
15. Download Page
Create unlimited download pages compatible with SafeLinks. This functionality is compatible with posts and pages and is also fully customizable.
15.1. Get Link Button
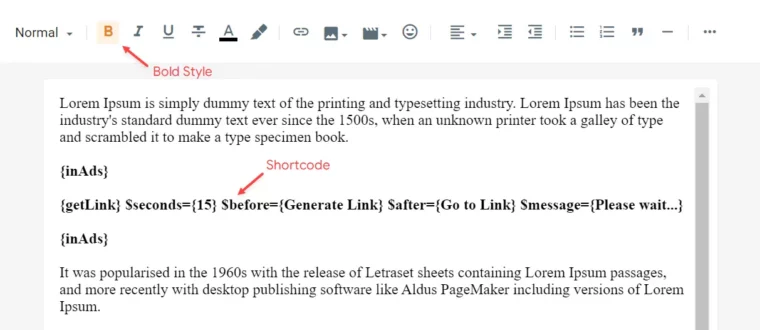
This function will unlock the download button available on the page after the timeout. Follow the instructions below to create the get link button.
Shortcode: {getLink} $seconds={15} $before={Generate Link} $after={Go to Link} $message={Please wait...}
Shortcode Options: All attributes are optional! Just use {getLink} to get the default text and timeout.
Example:
15.2. Download Button
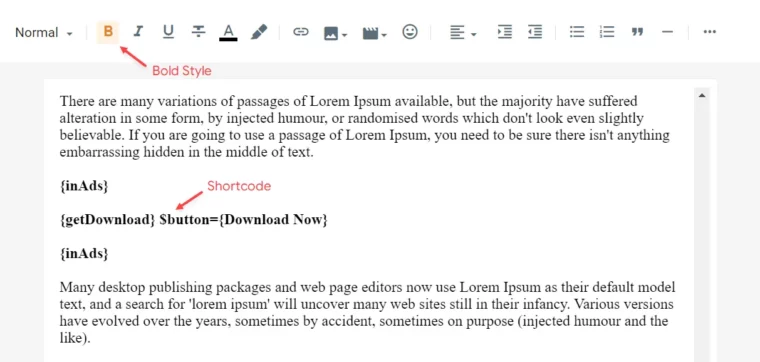
This function will decrypt the safelink and redirect the user to the destination after the click. Follow the instructions below to create the download button.
Shortcode: {getDownload} $button={Button Text}
Button Text: This attribute are optional! The default value is Download.
Example:
16. Safe Page
Create a safe page compatible with SafeLinks. The safe page is similar to the download page, but does not require the use of a timeout.
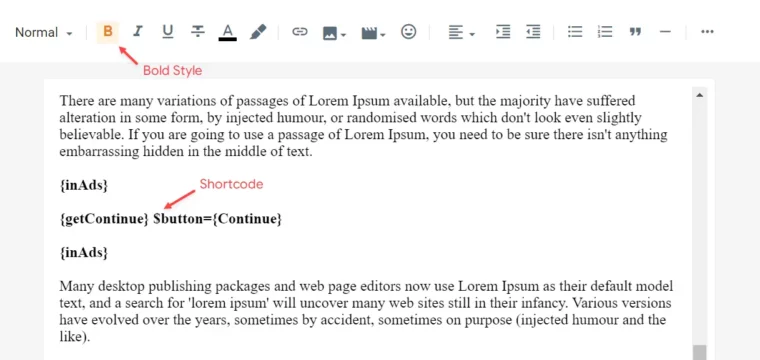
This functionality will decrypt the safelink and redirect the user to the destination after clicking the continue button. Follow the instructions below to create the continue button.
Shortcode: {getContinue} $button={Button Text}
Button Text: This attribute are optional! The default value is Continue.
Example:
17. Related Posts
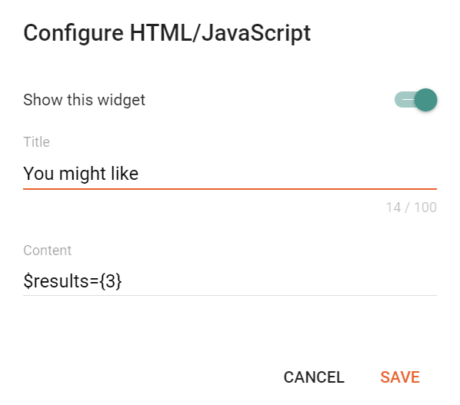
Access your blog Layout > and click on the Edit Icon > in the Related Posts gadget.
Shortcode: $results={Number of Results} $label={Label Name}
Label Name: related, recent, Custom Label
The $label={} attribute is optional! The default value is related.
Example:
18. Post Footer ADS
Access your blog Layout > and click on the Add a Gadget > HTML/JavaScript, Image or AdSense > in the Post Footer ADS section.
Example:

19. Social Counter (Sidebar)
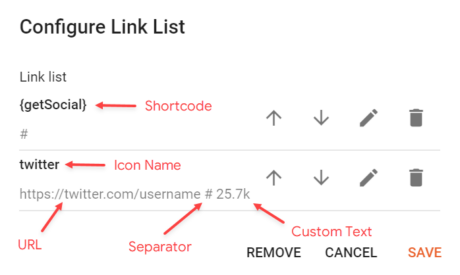
Access your blog Layout > and click on the Add a Gadget > Link List > in the Sidebar section.
Supported Icons: google, blogger, apple, amazon, microsoft, facebook, facebook-f, twitter, twitter-x, rss, youtube, skype, stumbleupon, tumblr, vk, stack-overflow, github, linkedin, dribbble, soundcloud, behance, digg, instagram, pinterest, pinterest-p, twitch, steam, delicious, codepen, flipboard, reddit, whatsapp, telegram, messenger, snapchat, discord, quora, tiktok, email, share, external-link
Shortcode: {getSocial}
Link Structure: https://twitter.com/username # Twitter
Example:
20. Post Gadgets (Sidebar)
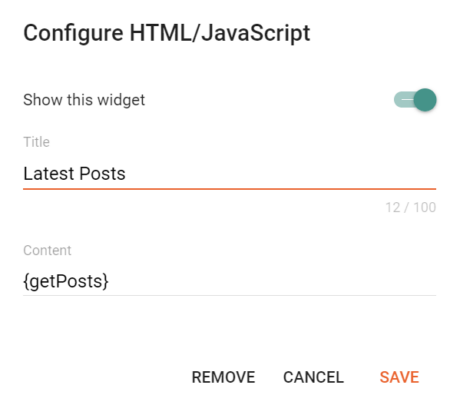
Access your blog Layout > and click on the Add a Gadget > HTML/JavaScript > in the Sidebar section.
Shortcode: {getPosts} $results={Number of Results} $label={Label Name}
Number of Results: The attribute $results={} is optional! Default is 4.
Label Name: Custom Label, recent
The $label={} attribute is optional! The default value is recent.
Example:
21. Sidebar Ads
With this feature you will be able to display custom ads in the sidebar without the gadget style.
Shortcode: {ads}
Example:

22. Mailchimp Subscribe Form
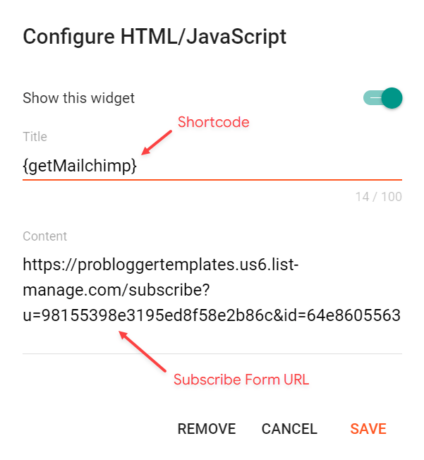
Access your blog Layout > and click on the Add a Gadget > HTML/JavaScript > in the Sidebar section.
Shortcode: {getMailchimp} $title={Gadget Title} $text={Gadget Text}
Gadget Attributes: The $title={} and $text={} attributes are optional.
Example:
22.1. How to Get The Mailchimp Subscribe Form URL?
You can get the link easily by following the steps below.
A – Create a free account on Mailchimp – Create Now
B – After creating your account go to Audience > Signup forms > Form builder.
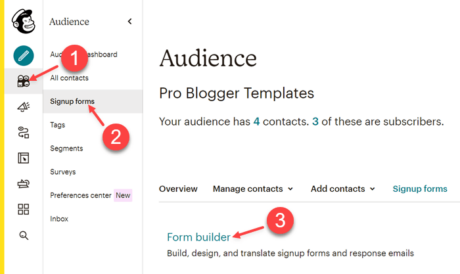
C – Create and customize your form according to your needs.
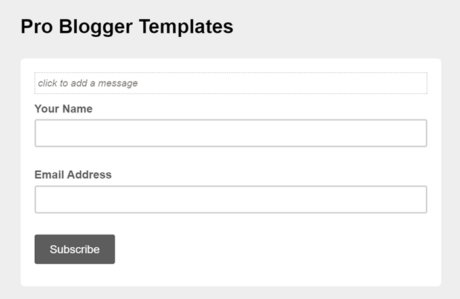
D – Copy and access the Signup form URL.

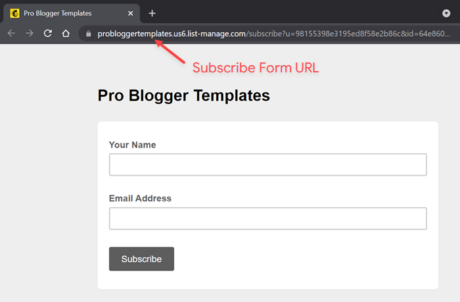
E – After the page loads, Copy the final Subscribe Form URL into your browser’s address bar.
23. Footer ADS
Access your blog Layout > and click on the Add a Gadget > HTML/JavaScript, Image or AdSense > in the Footer ADS section.
Example:

23.1. Display Options
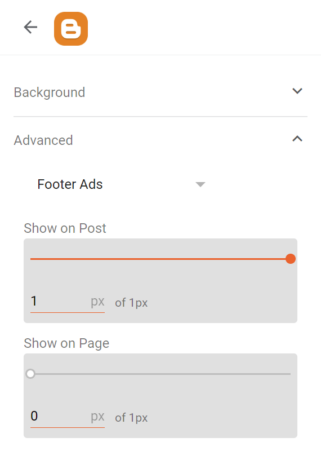
Go to your blog Theme > Customize > Advanced > Footer ADS > to change the visibility on Posts and Pages.
24. About Section
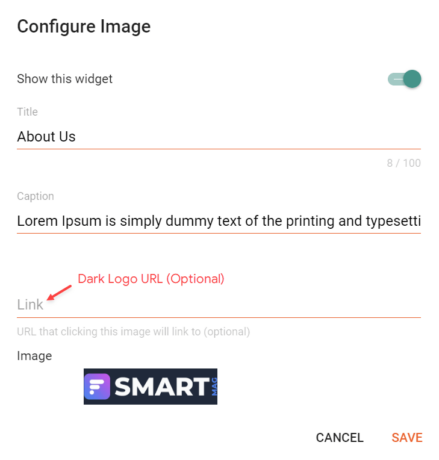
Access your blog Layout > and click on the Edit Icon > in the About Section gadgets.
24.1. About Us
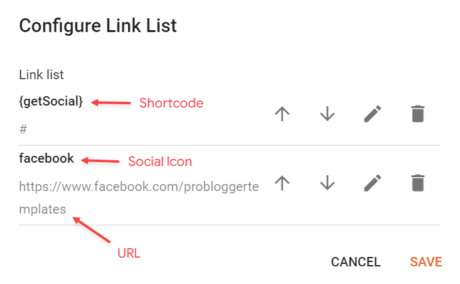
24.2. Social Icons
Supported Icons: google, blogger, apple, amazon, microsoft, facebook, facebook-f, twitter, twitter-x, rss, youtube, skype, stumbleupon, tumblr, vk, stack-overflow, github, linkedin, dribbble, soundcloud, behance, digg, instagram, pinterest, pinterest-p, twitch, steam, delicious, codepen, flipboard, reddit, whatsapp, telegram, messenger, snapchat, discord, quora, tiktok, email, share, external-link
Shortcode: {getSocial}
Example:
25. Footer Copyright
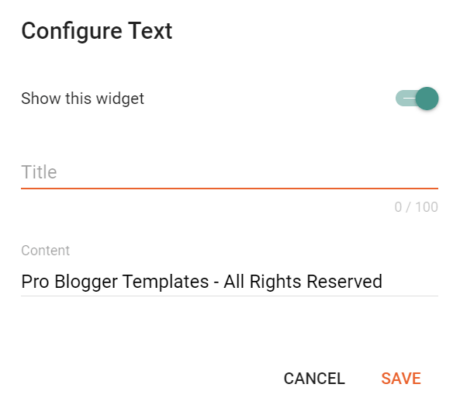
Access your blog Layout > and click on the Edit Icon > in the Footer Copyright gadget.
Example:
26. Footer Menu
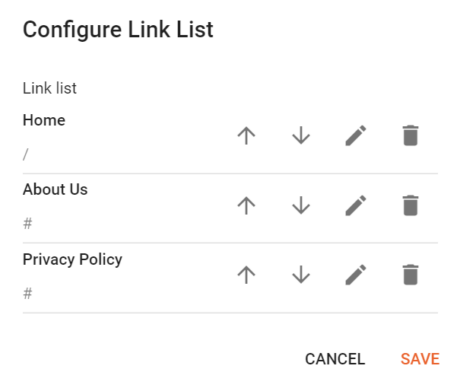
Access your blog Layout > and click on the Edit Icon > in the Footer Menu gadget.
Example:
27. Cookie Consent
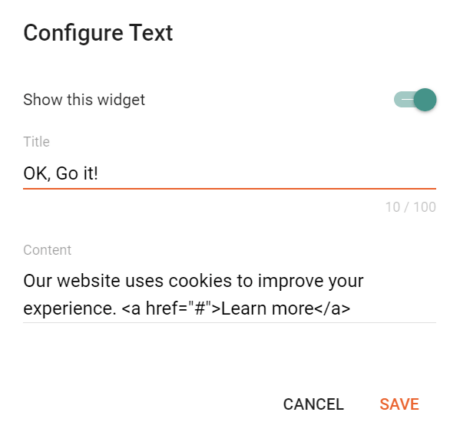
Access your blog Layout > and click on the Edit Icon > in the Cookie Consent gadget.
Example:
28. Theme Options
This template allows you to customize some options directly in the layout.
28.1. Deafult Thumbnail
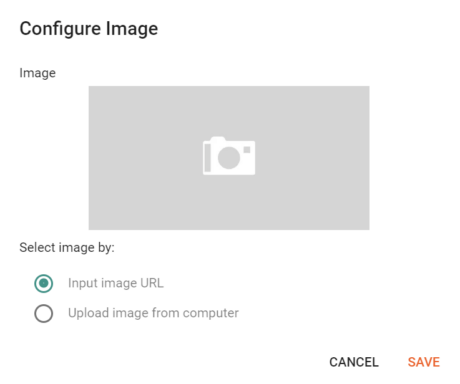
Access your blog Layout > and click on the Edit Icon > in the Theme Options > Default Thumbnail gadget.
Example:
28.2. JSON Variables
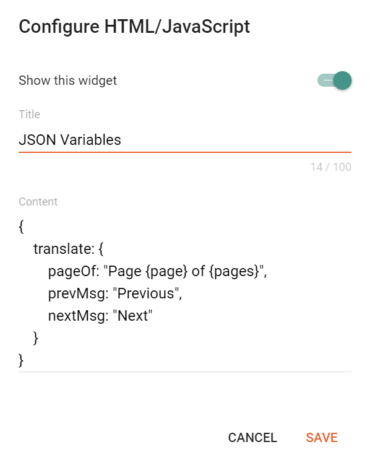
Access your blog Layout > and click on the Edit Icon > in the Theme Options > JSON Variables gadget.
{
    translate: {
        pageOf: "Page {page} of {pages}",
        prevMsg: "Previous",
        nextMsg: "Next"
    }
}
pageOf: default is Page {page} of {pages}
prevMsg: default is Previous
nextMsg: default is Next
Example:
29. Feed Settings
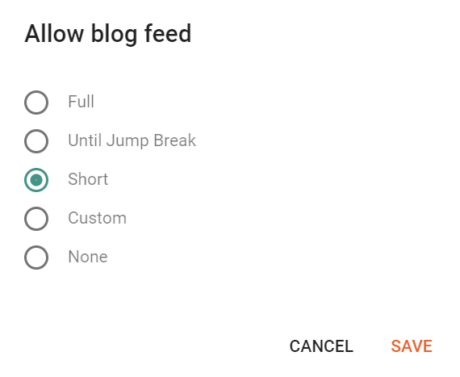
Access your blog Settings > and go to Site Feed > Allow Blog Feed.
This template has a native feed system that does not require the default Blogger system. Therefore, for better performance and security, it is recommended to change to Short mode.
Example:
30. Shortcut Keys
This exclusive feature allows the user to use shortcut keys to perform small activities on your site.
30.1. Ajax Search
Show Search Modal: Ctrl + K
Hide Search Modal: Esc
30.2. Share Modal (Post Page)
Show Share Modal: Ctrl + S
Hide Share Modal: Esc
30.3. Post Navigation (Post Page)
Previous Post: Ctrl + Arrow Left
Next Post: Ctrl + Arrow Right
31. How to Customize SmartMag Template?
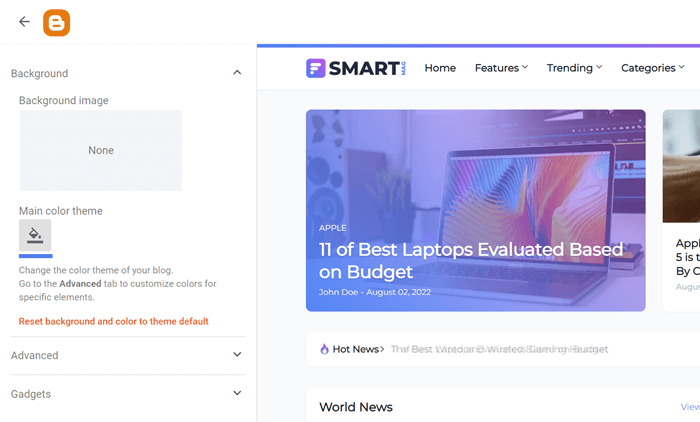
Access your blog Theme > and click on the Customize button > and explore Background and Advanced options.
Fully Customizable: Layout Options, Fonts, Background, Colors, Display Options and more.
